Photoelectric Wireless Interconnected Smoke Alarms are one of the most vital safety features in any home. These life-saving devices detect smoke early, providing you and your family with the critical time needed to evacuate before a fire spreads uncontrollably. However, simply installing smoke alarms isn’t enough. Many homeowners neglect proper maintenance, reducing the effectiveness of their alarms in an emergency. A poorly maintained smoke alarm may fail to activate when it matters most, putting lives and property at serious risk.
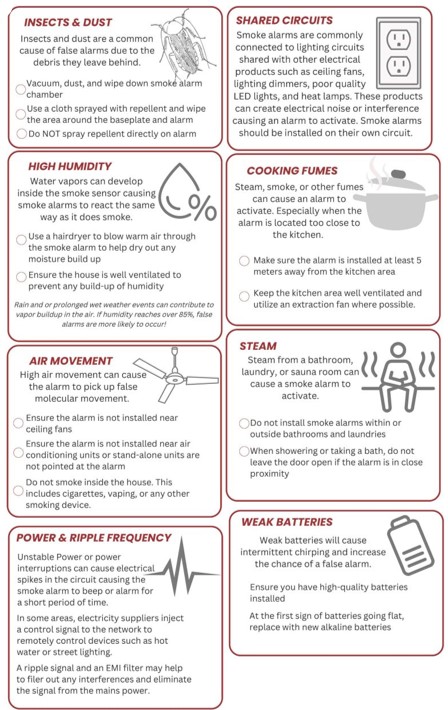
Regular testing and cleaning of your wireless interconnected smoke alarms help ensure they remain in optimal working condition. Dust, dirt, and even small insects can accumulate inside the alarm, affecting the sensors and leading to false alarms or, worse, failure to detect real smoke. Proper maintenance not only guarantees the functionality of your smoke alarms but also extends their lifespan, ensuring they last their full 10-year battery life without issues.
How To Clean Your Wireless Interconnected Smoke Alarms
Wireless interconnected smoke alarms rely on highly sensitive photoelectric sensors to detect smoke particles in the air. Over time, these sensors can become obstructed by dust, pet hair, cobwebs, or other debris, reducing their effectiveness. If left unchecked, this build-up can cause delayed detection or even prevent the alarm from sounding in a fire.
Regular cleaning is essential to keep your photoelectric wireless interconnected smoke alarms functioning at their best. It’s a simple process that takes only a few minutes but could save your life.
Cleaning your ZEN wireless interconnected smoke alarms is quick and easy! Watch our short video below for step-by-step guidance.
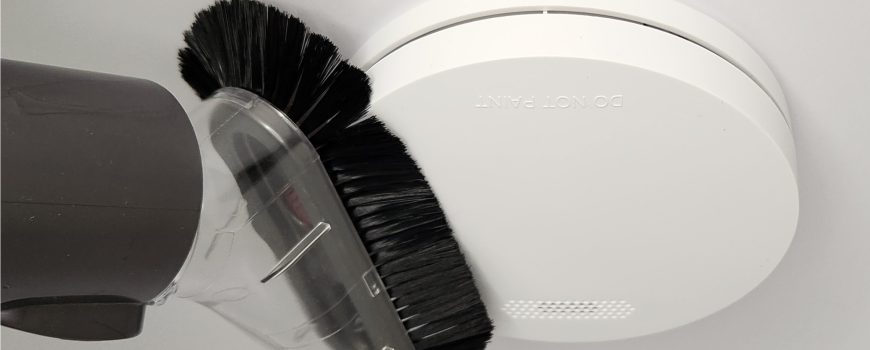
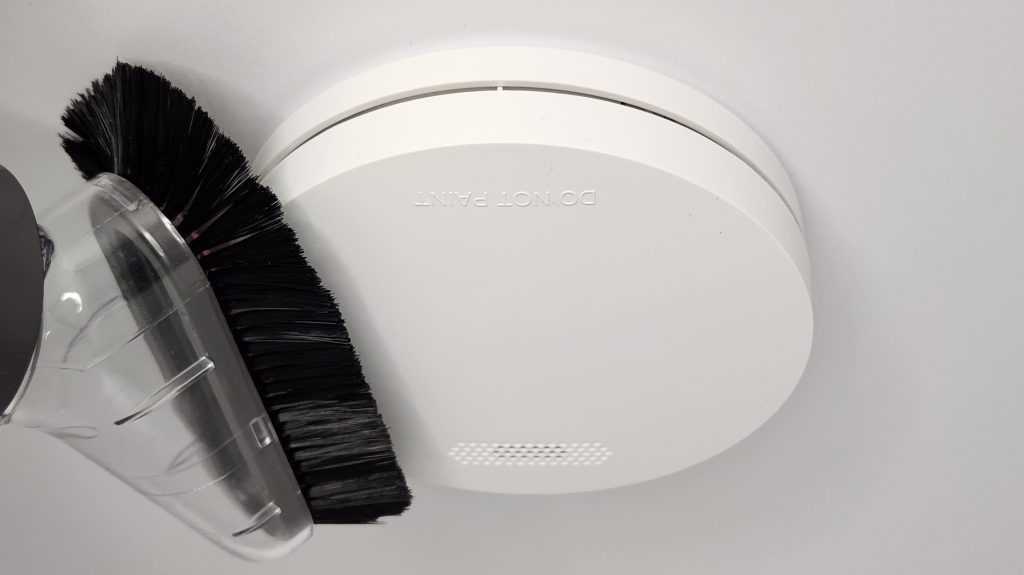
- Use a soft brush or vacuum attachment – Gently vacuum around the air intake grill and external perimeter of the alarm to remove dust and debris.
- Check for cobwebs and insects – These can obstruct the sensors, so ensure they’re cleared away.
- Never use liquids or aerosol sprays – Cleaning agents can damage the smoke alarm’s internal components and impact performance.
- Schedule regular cleaning – We recommend cleaning all your wireless interconnected smoke alarms at least every six months to maintain optimal sensitivity.
A clean and well-maintained ZEN wireless interconnected smoke alarm ensures reliable operation when you need it most. Take a few minutes to clean your alarms today—because fire safety starts with prevention! 🚨
How To Test Your Wireless Interconnected Smoke Alarms
Regularly testing your wireless interconnected smoke alarms is crucial to ensuring they function properly when you need them most. Fire safety experts recommend testing your ZEN Smoke Alarms at least once a month to verify that all alarms are in working order. This simple routine check helps detect any potential issues before they become a risk to your home and family.
Before testing, it’s a good idea to notify everyone in the home, as the alarms will produce a loud beeping sound. If you have young children or pets, prepare them for the noise so they are not startled.
Testing your ZEN wireless interconnected smoke alarms is quick and easy:
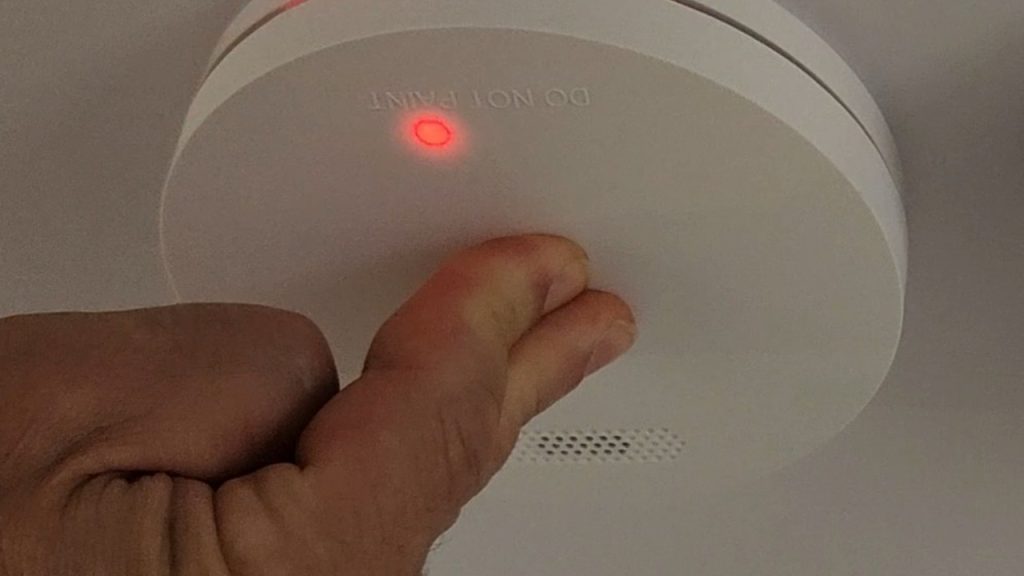
- Press the test button – Locate the centre surface of the alarm and firmly press it. This will initiate the test sequence.
- Use the optional remote control – If you have the ZEN remote control, simply press the test button once. This provides a convenient way to test all your alarms simultaneously without having to reach each one manually.
- Check for response – Within 10 seconds, all wireless interconnected smoke alarms should activate. You will hear a loud beeping sound, and the red LED indicator lights will flash on each alarm.
- Automatic silencing – After approximately 10 seconds, all alarms will stop beeping automatically, indicating that the test is complete.
Watch our short instructional video below for a step-by-step guide!
When Should You Test
Wireless Interconnected Smoke Alarms?
Aside from monthly testing, it’s also essential to test your ZEN wireless interconnected smoke alarms in the following situations:
- After home renovations – Painting, sanding, and installing new carpets can create fine dust that may enter the alarm’s sensors. Always test your alarms after any home improvements to ensure they are functioning correctly.
- Before moving into a new home – If you’re renting or buying a property, test the smoke alarms as soon as you move in to confirm they are in working order.
- After replacing a smoke alarm – If you install a new wireless interconnected smoke alarm, test it immediately to ensure it successfully connects with the other alarms in your home.
Important Pro Tip: Never Paint Over Your Smoke Alarm!
When repainting your ceilings, avoid painting over your smoke alarms. Paint can block the sensors, reducing their ability to detect smoke and causing malfunctions. If needed, use painter’s tape to protect your smoke alarm while painting around it.
By following these simple testing and maintenance steps, you can ensure your ZEN wireless interconnected smoke alarms are always ready to protect your home and loved ones. 🚨
Why Testing Your Interconnected Smoke Alarm Is Important
Testing your wireless interconnected smoke alarms regularly is essential for ensuring they function correctly when you need them most. A smoke alarm that fails to detect smoke won’t provide the life-saving warning needed to escape a fire. In a worst-case scenario, this could lead to devastating consequences, including injury, loss of life, or property destruction.
Why Regular Testing and Maintenance Matters
Smoke alarms are especially critical at night when you’re asleep. Many house fires occur while residents are unaware, and without a properly functioning alarm, there’s a significant risk of delayed evacuation. Wireless interconnected smoke alarms provide an added layer of safety by ensuring that if one alarm detects smoke, all alarms in the home will sound simultaneously—giving you and your family the best chance of escape.
Cleaning your smoke alarms is just as important as testing them. Over time, dust, insects, and debris can accumulate, affecting their sensitivity. Regular maintenance of your photoelectric wireless interconnected smoke alarms ensures they remain fully operational and last their full 10-year lifespan without issues.
At ZEN Smoke Alarms, we make cleaning and testing easy! Our ZEN wireless interconnected smoke alarms are designed for hassle-free maintenance, ensuring your home remains protected 24/7. Stay safe, sleep soundly, and trust ZEN for your fire safety needs. Be sure to take good care of your wireless interconnected smoke alarms – and they will take good care of you!

Want to know more? Watch our ZEN Smoke Alarm YouTube channel or call us on 0478 596 402 today
We love talking smoke alarms!
ZEN Interconnected Smoke Alarms
New Farm, QLD, 4005